Notification destinations
Add and work with notification destinations
Section titled “Add and work with notification destinations”Add notification destinations to tell Paddle which events you’d like to receive and where to deliver them to. Once added, you can update, deactivate and reactivate, and delete destinations.
A notification destination is a webhook endpoint that Paddle sends notifications about events to. When adding a notification destination, you can choose the kind of events that you’d like to receive notifications for.
You can add as many destinations as you like, but only 10 may be active at once.
Notification destination object
Section titled “Notification destination object”title: ""description: ""type: objectallOf: - $ref: "https://stoplight.io/api/v1/projects/paddle/api-specifications/nodes/models/notification_setting.yaml" - type: object properties: id: readOnly: true description: Unique Paddle ID for this notification destination, prefixed with `nftset_`. example: ntfset_01gkpjp8bkm3tm53kdgkx6sms7 type: description: Where this notification should be sent. enum: - url destination: description: Webhook endpoint URL. active: description: Whether this notification destination should receive the selected events. default: true api_version: description: API version that returned objects for events should conform to. example: 3 default: <latest> subscribe_to_future_events: description: Whether future events should be sent to this destination. include_sensitive_fields: description: Whether potentially sensitive fields should be sent to this destination. subscribed_events: description: Subscribed events for this notification destination. When creating or updating a notification destination, pass an array of names only. Paddle returns an object with additional information about a subscribed event. endpoint_secret_key: description: Webhook destination's secret key, used for signature verification. readOnly: truerequired: - description - type - destination - subscribed_eventsAdd a notification destination
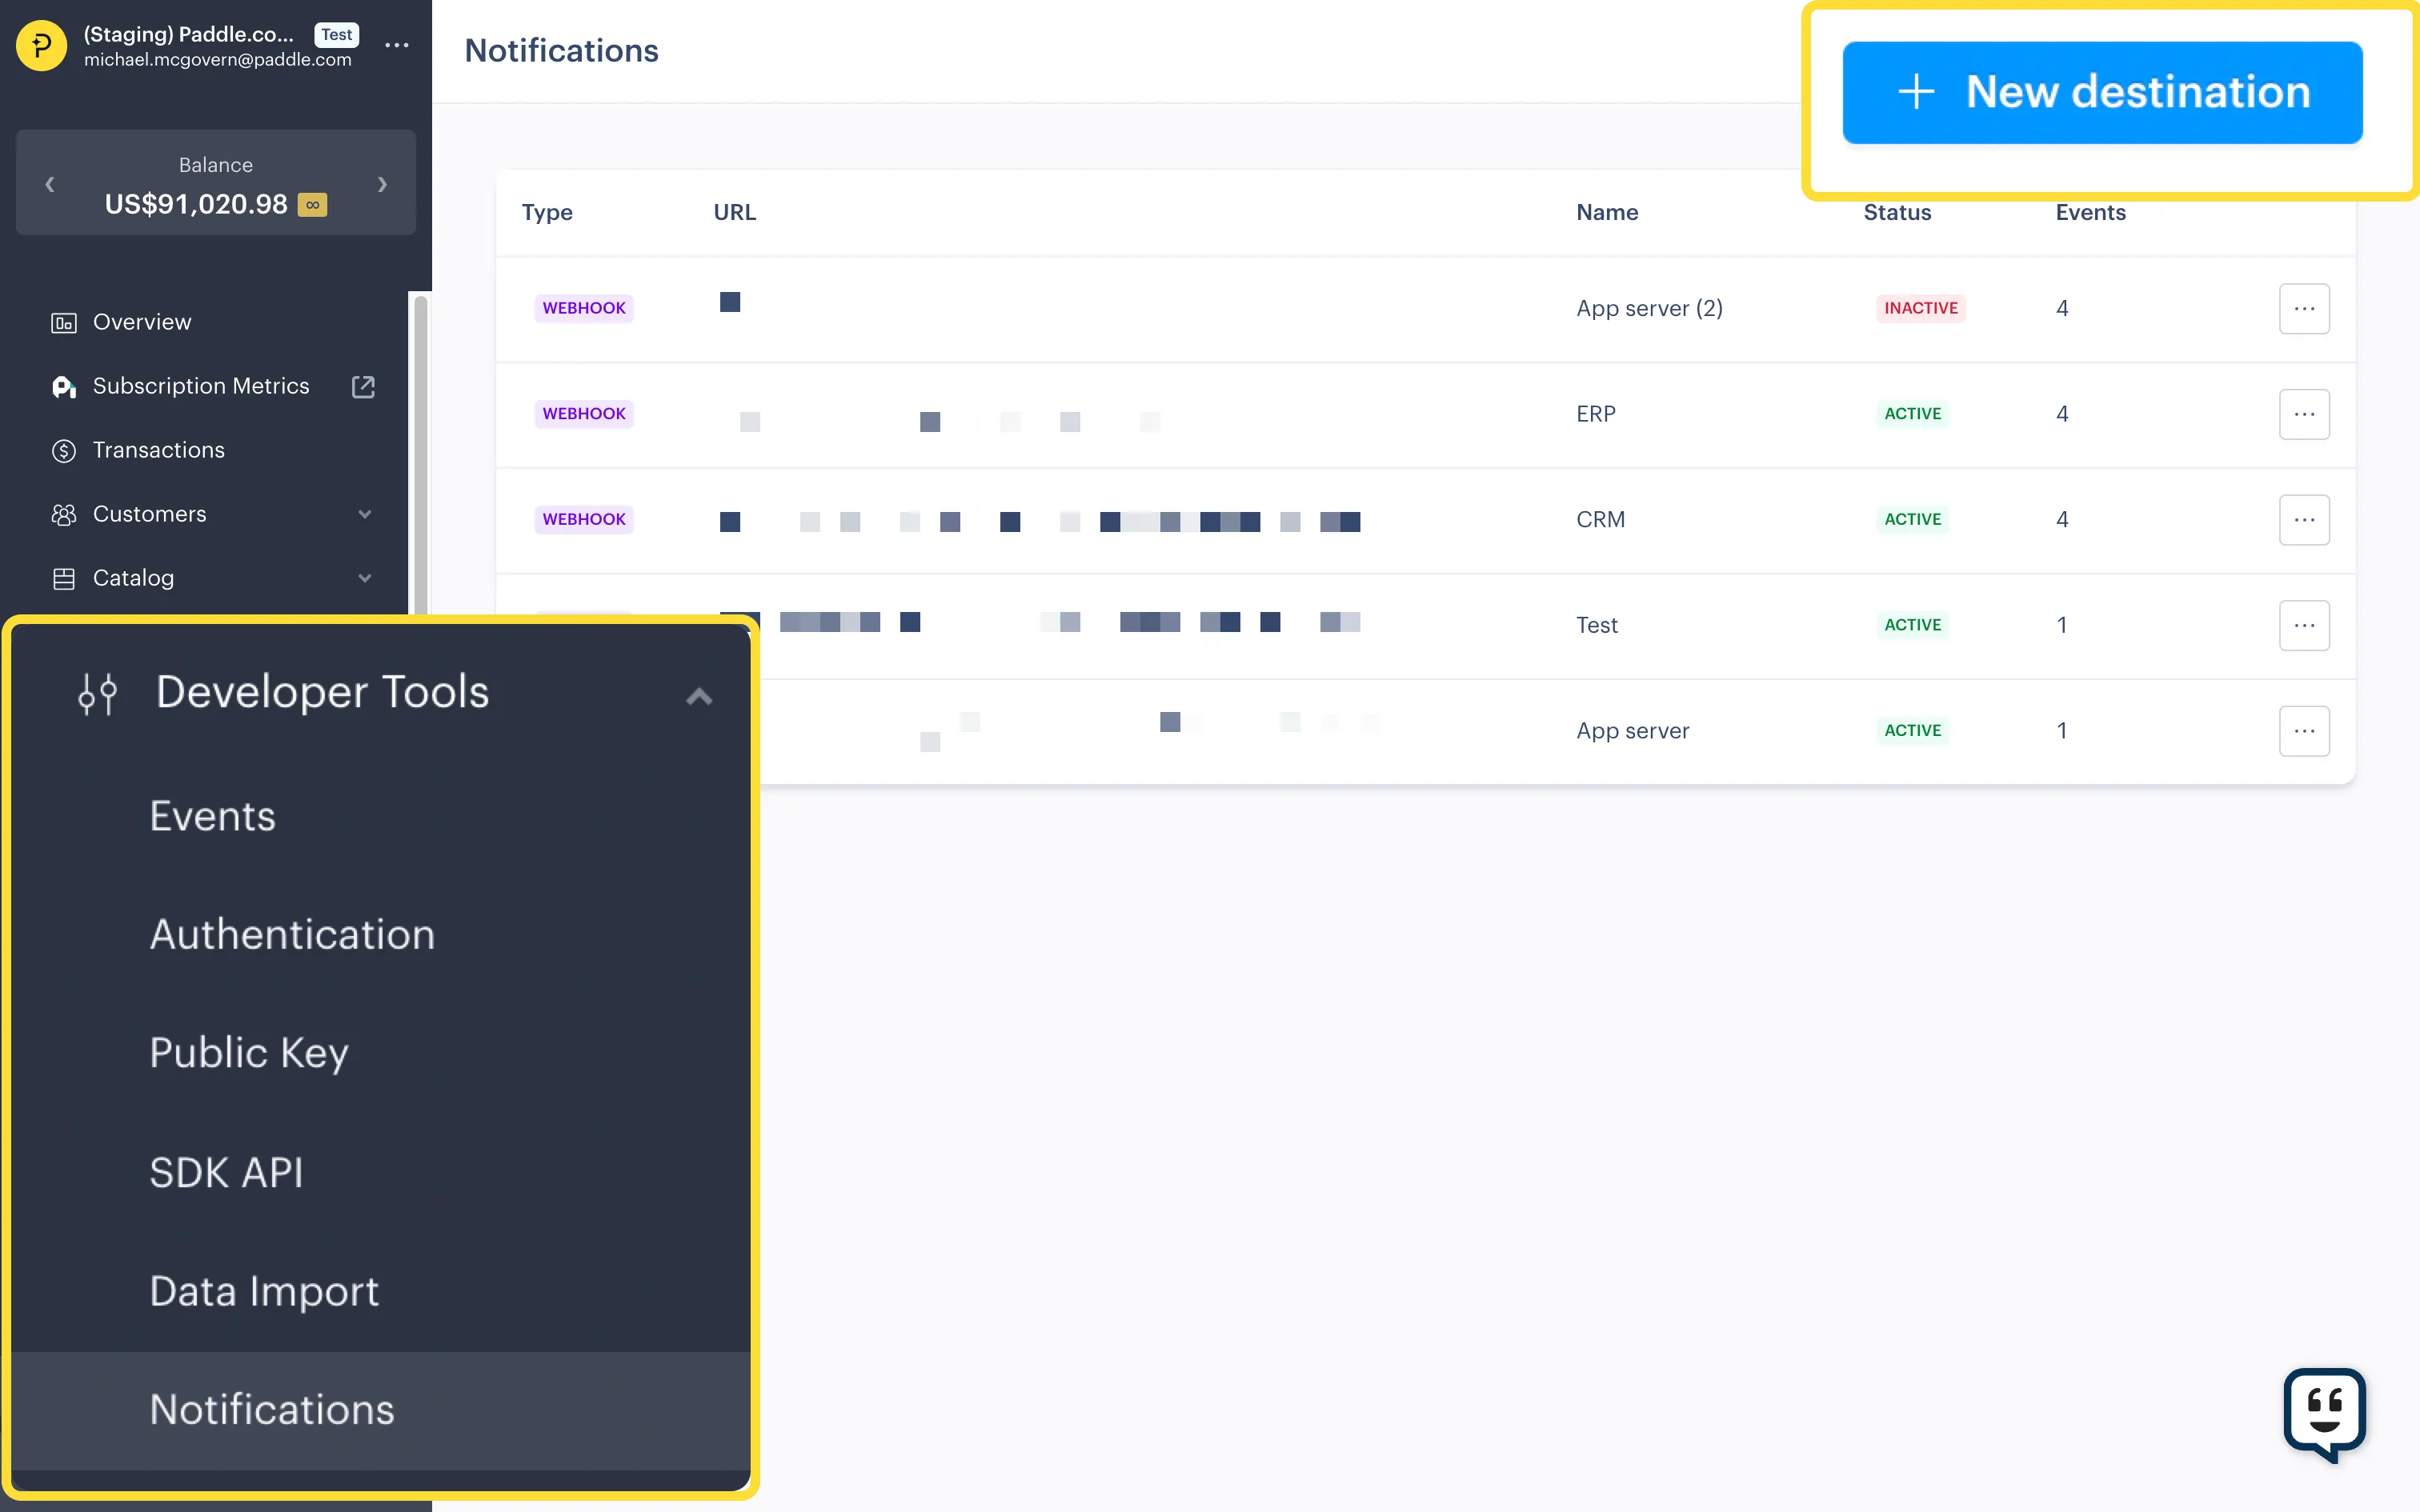
Section titled “Add a notification destination”Step 1: Open Notifications
Section titled “Step 1: Open Notifications”Go to Dashboard > Developer Tools > Notifications.
Click New destination.
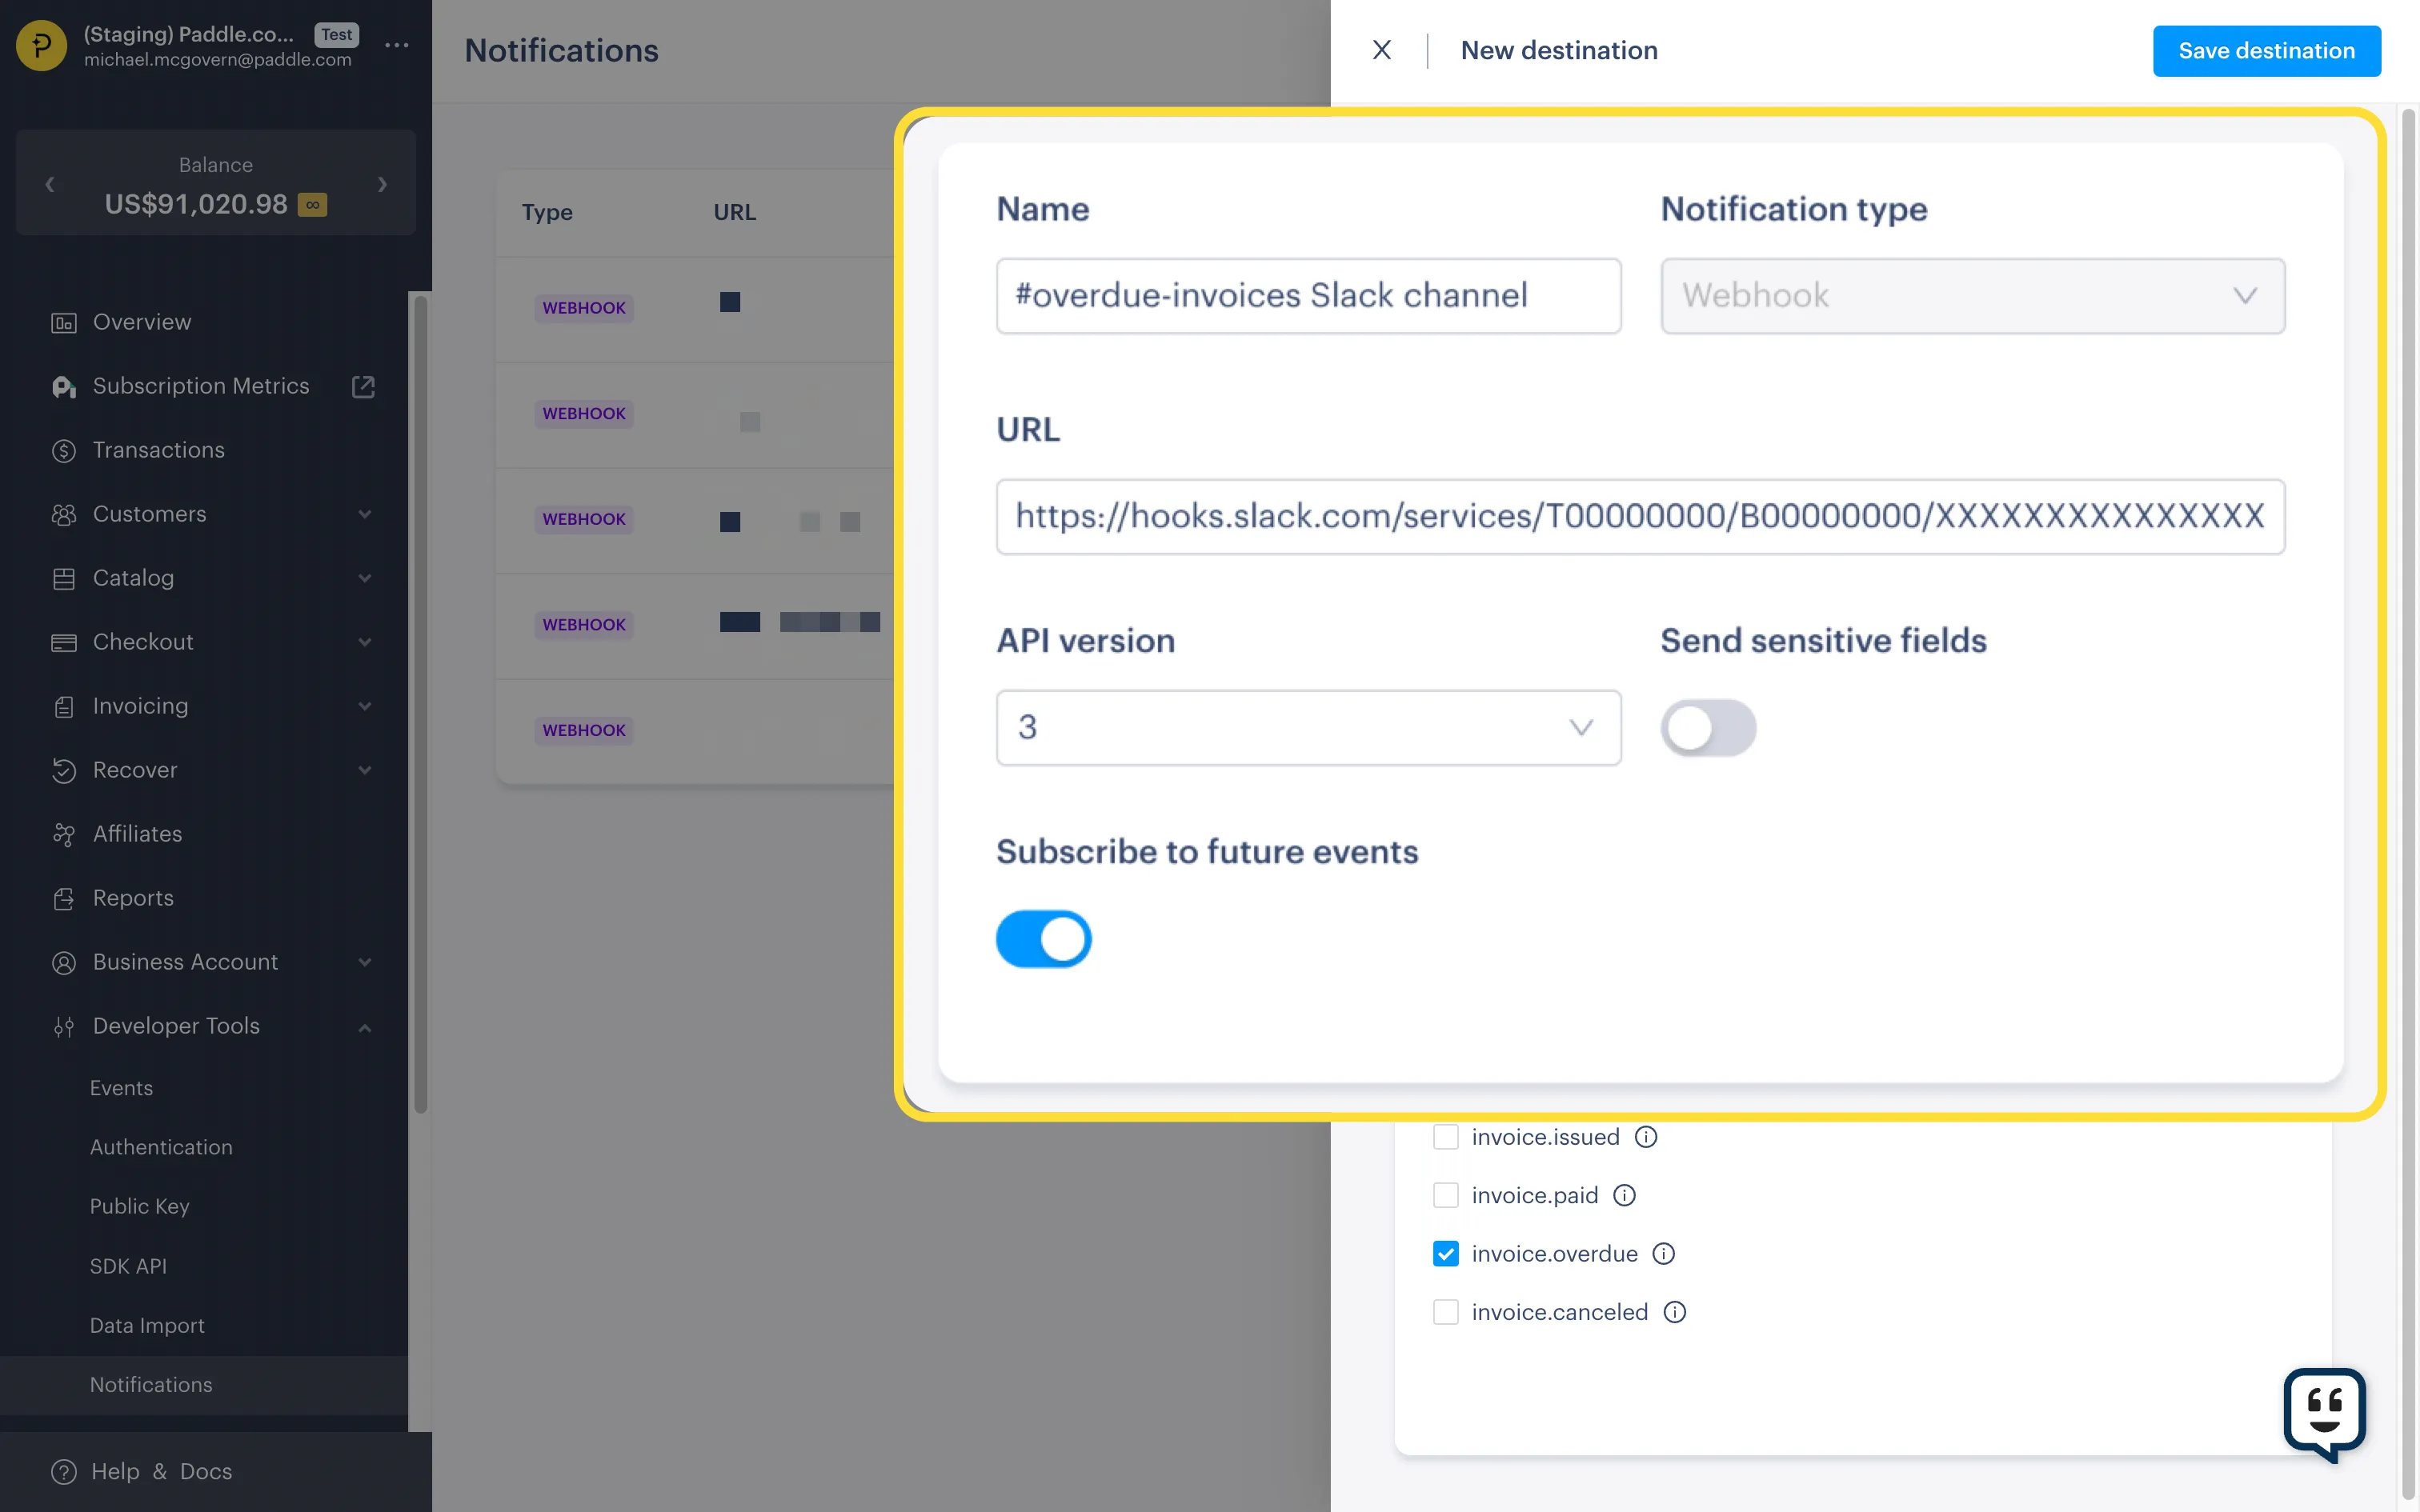
Step 2: Enter details
Section titled “Step 2: Enter details”Enter details for your new notification destination.
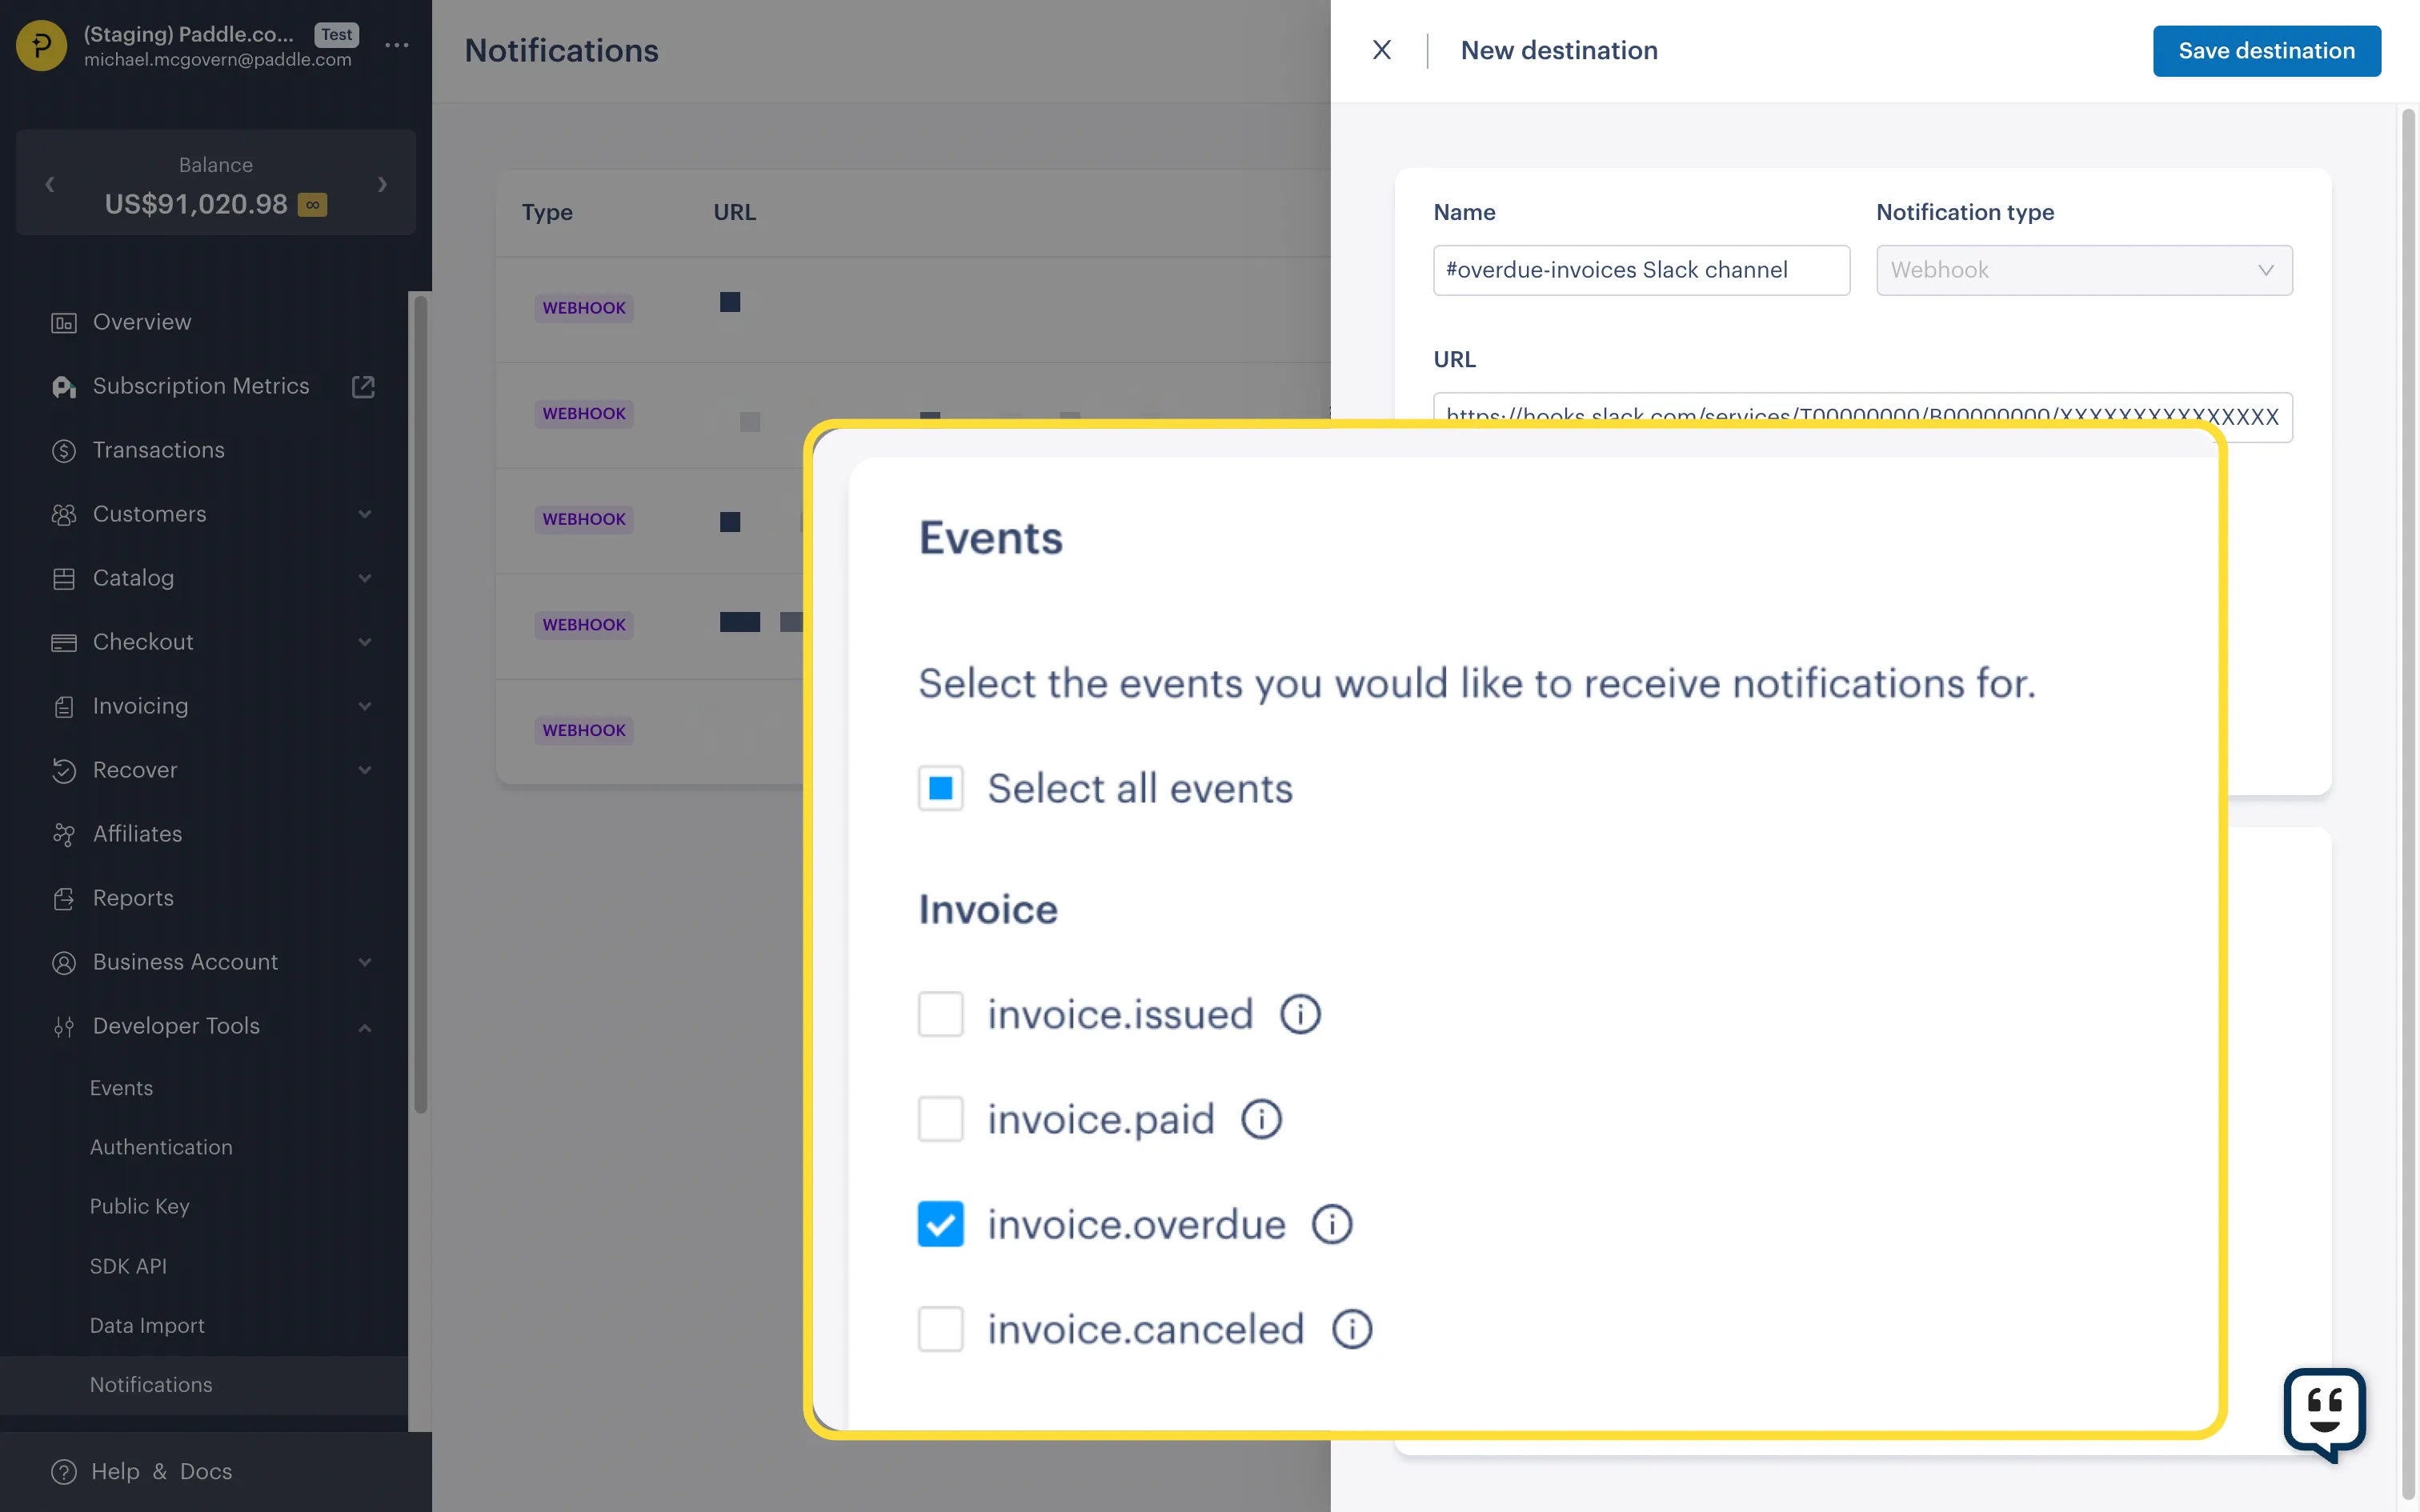
Step 3: Choose events
Section titled “Step 3: Choose events”Choose the events that you’d like to receive notifications for.
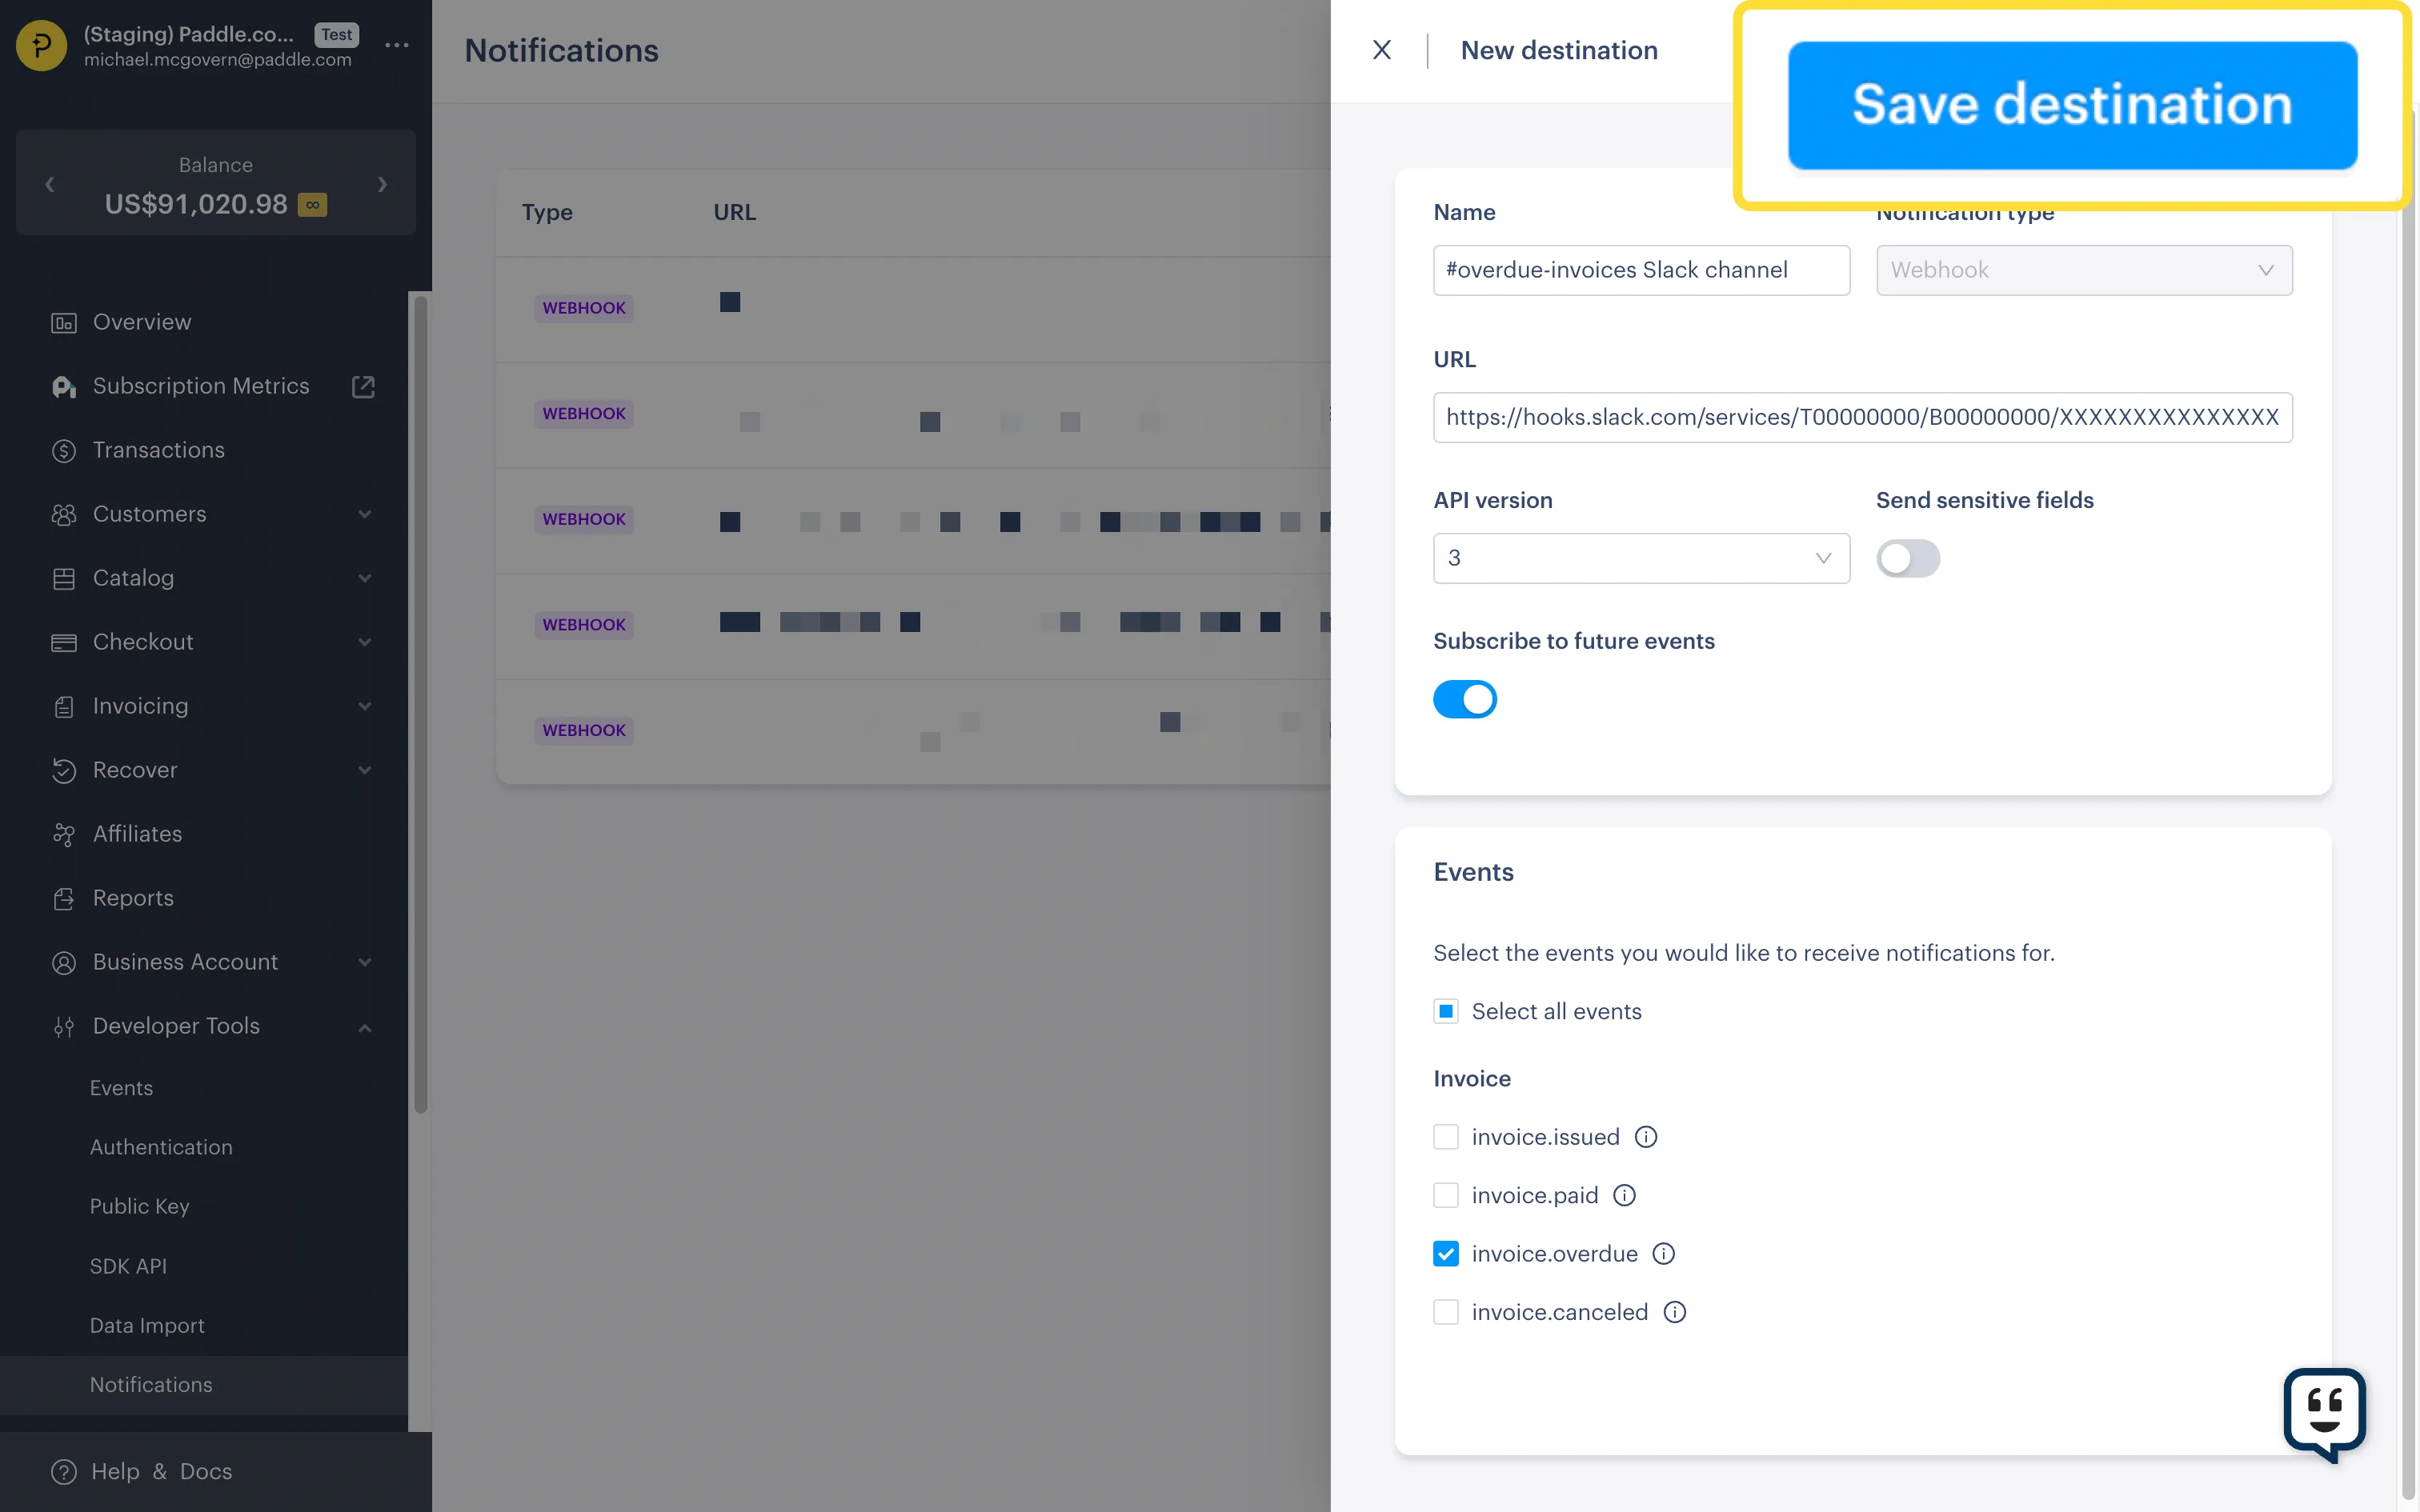
Step 4: Review and save
Section titled “Step 4: Review and save”Click Save destination when you’re done.
Update a notification destination
Section titled “Update a notification destination”Once you’ve created a notification destination, you can change:
destinationwebhook endpoint URLsend_sensitive_fieldssubscribe_to_future_eventssubscribed_events- whether it’s
activeor not
To change other fields, deactivate this notification destination and create another.
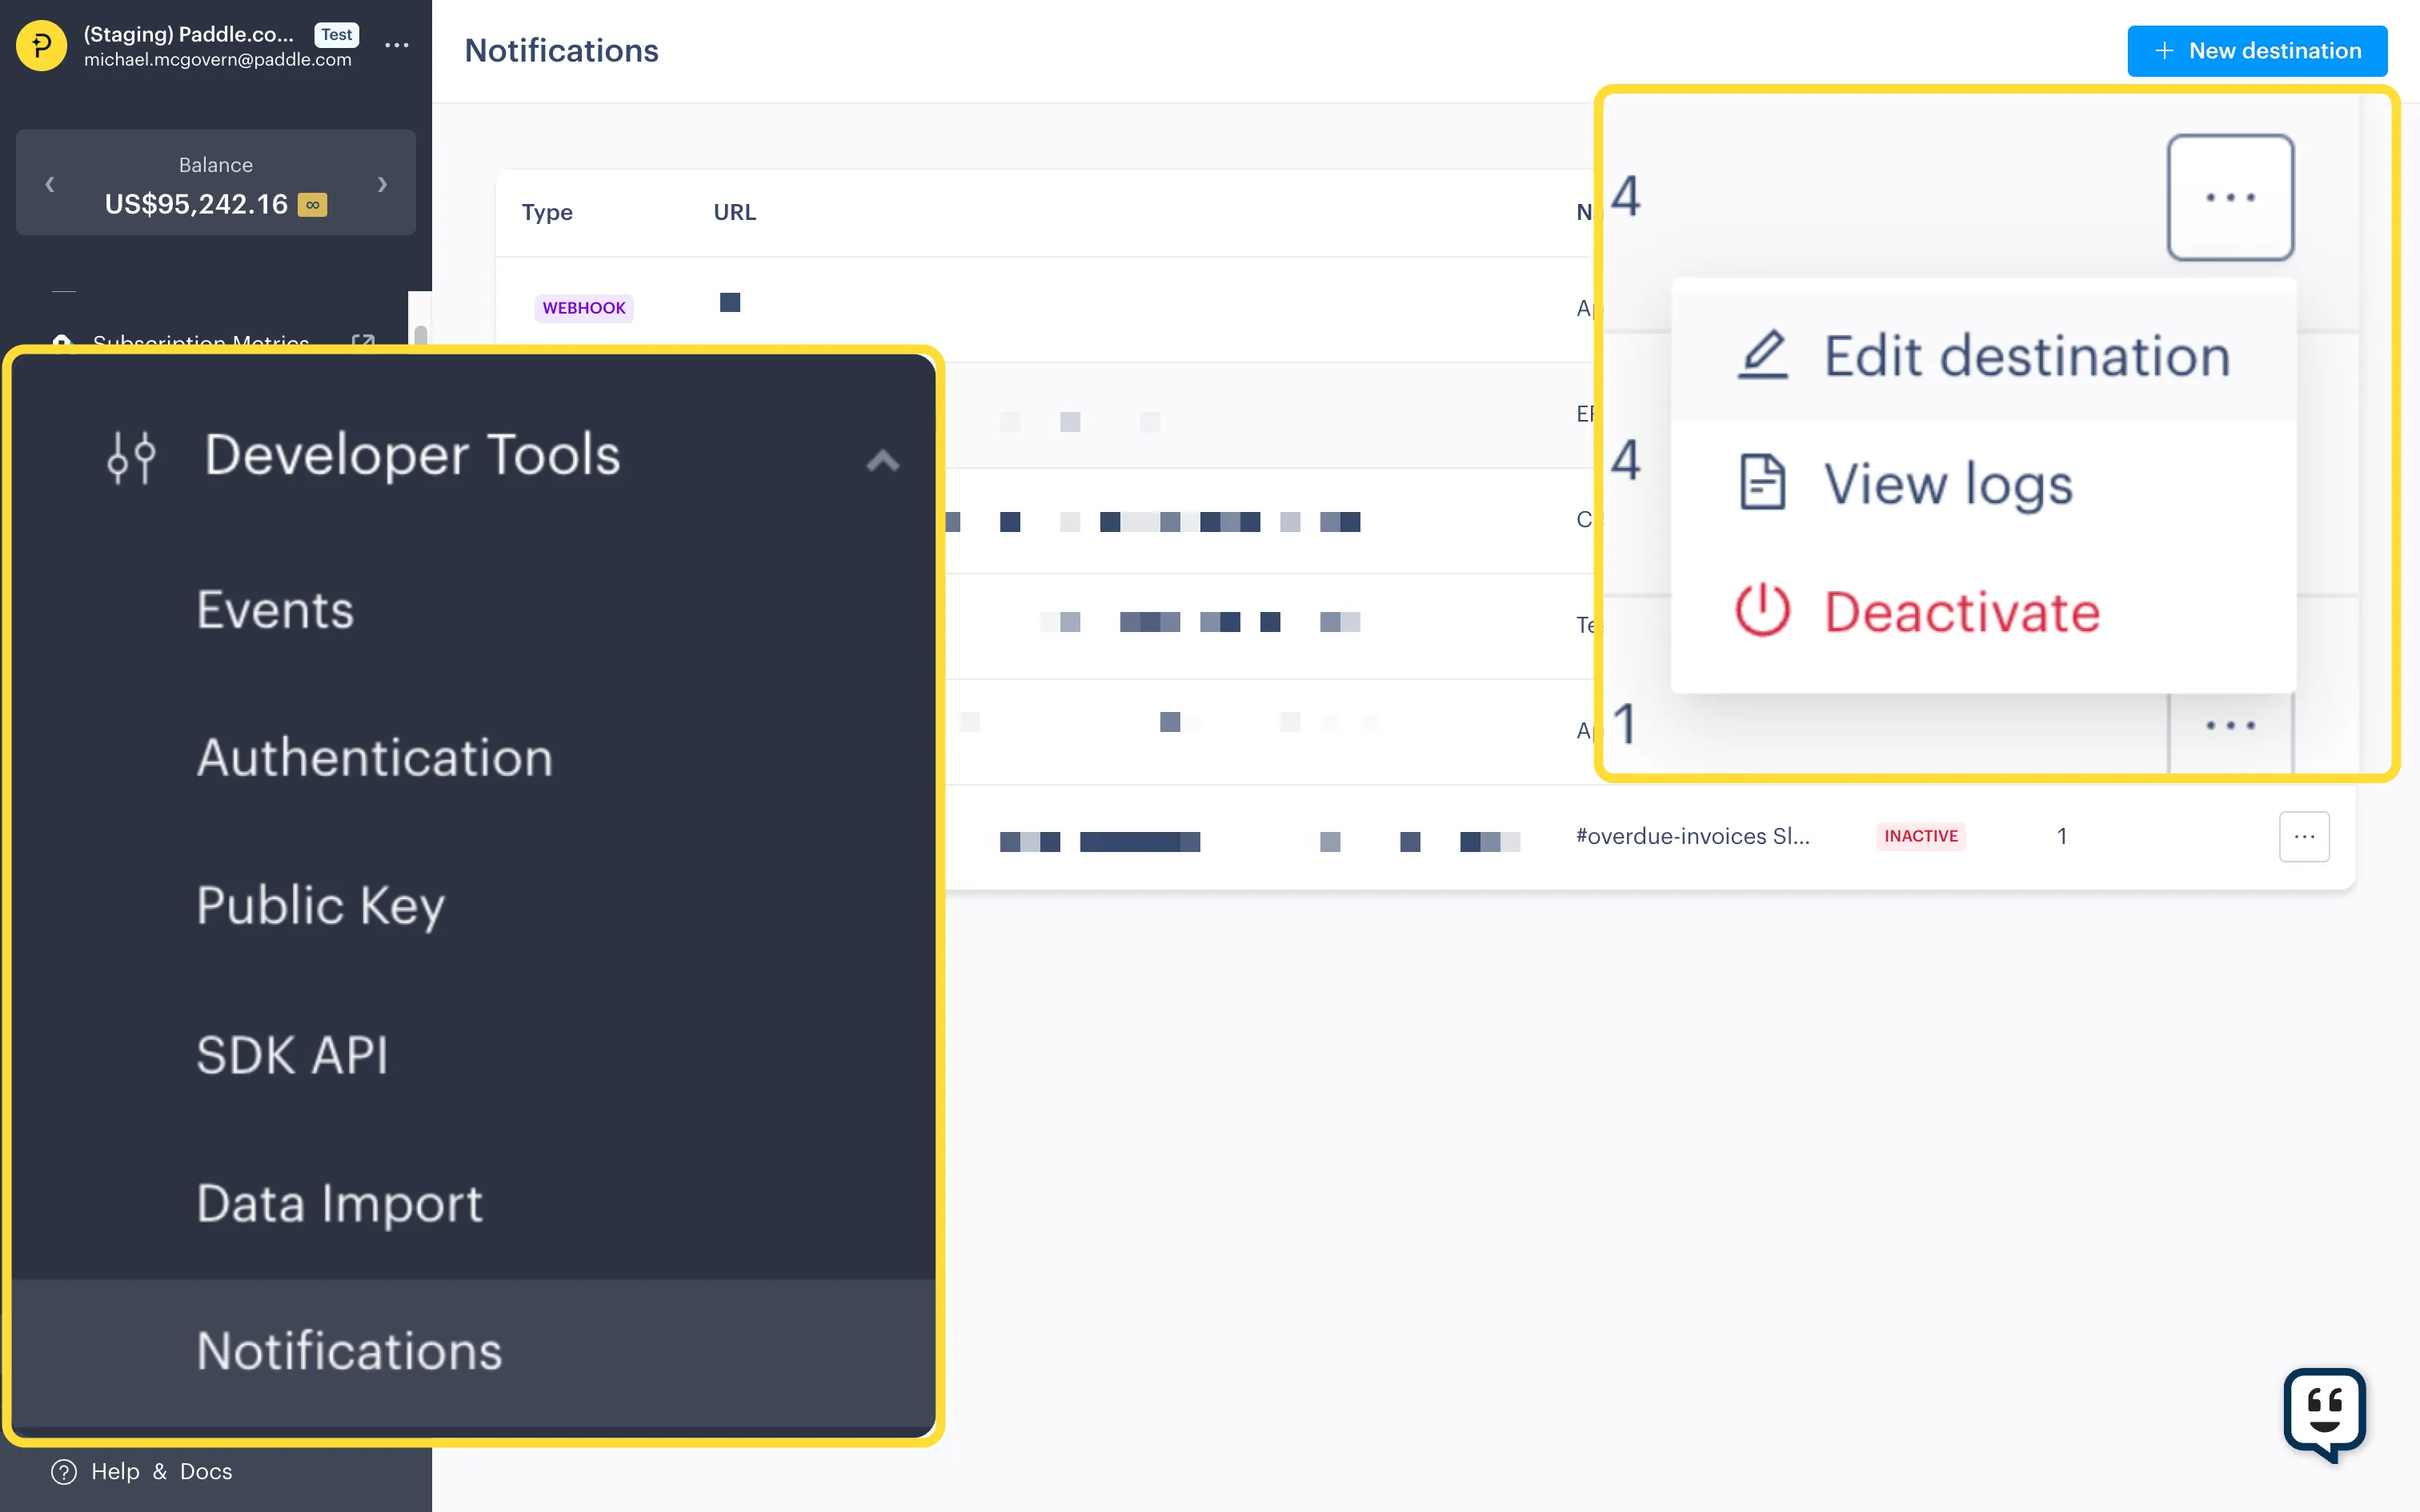
Open notifications
Section titled “Open notifications”Go to Dashboard > Developer Tools > Notifications.
Click the three dots next to a notification destination and choose Edit destination.
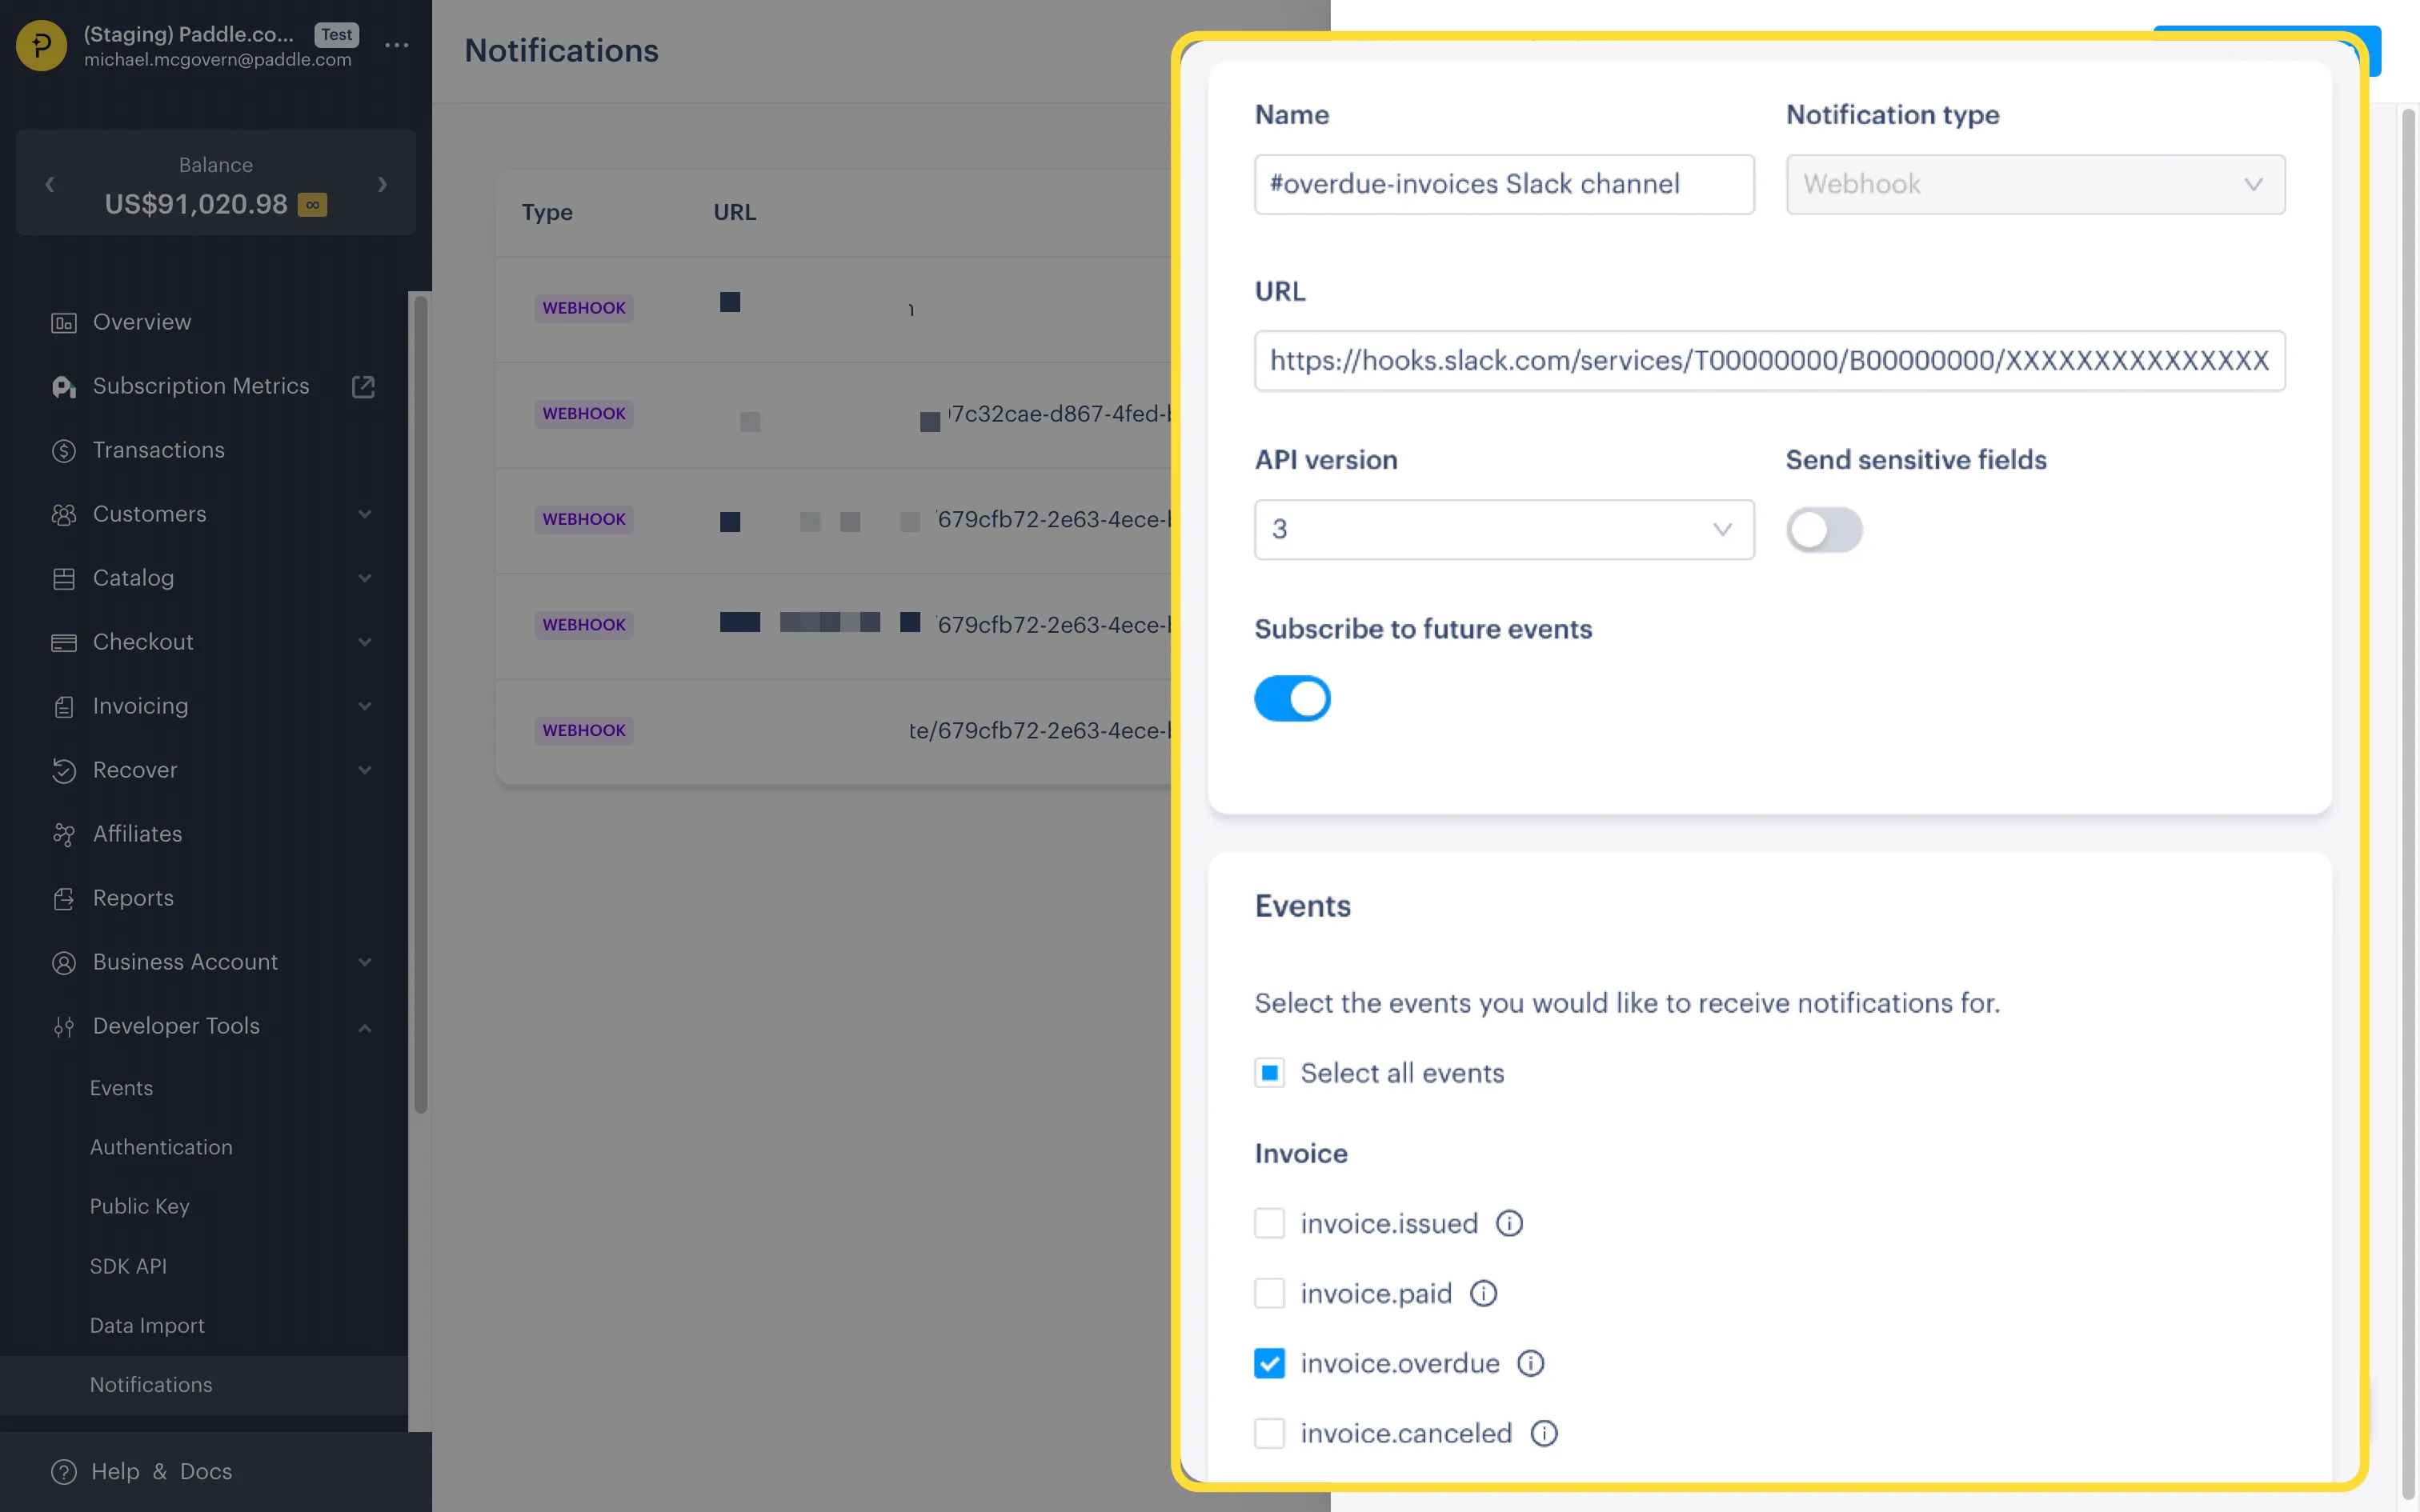
Make changes
Section titled “Make changes”Edit notification destination details and events.
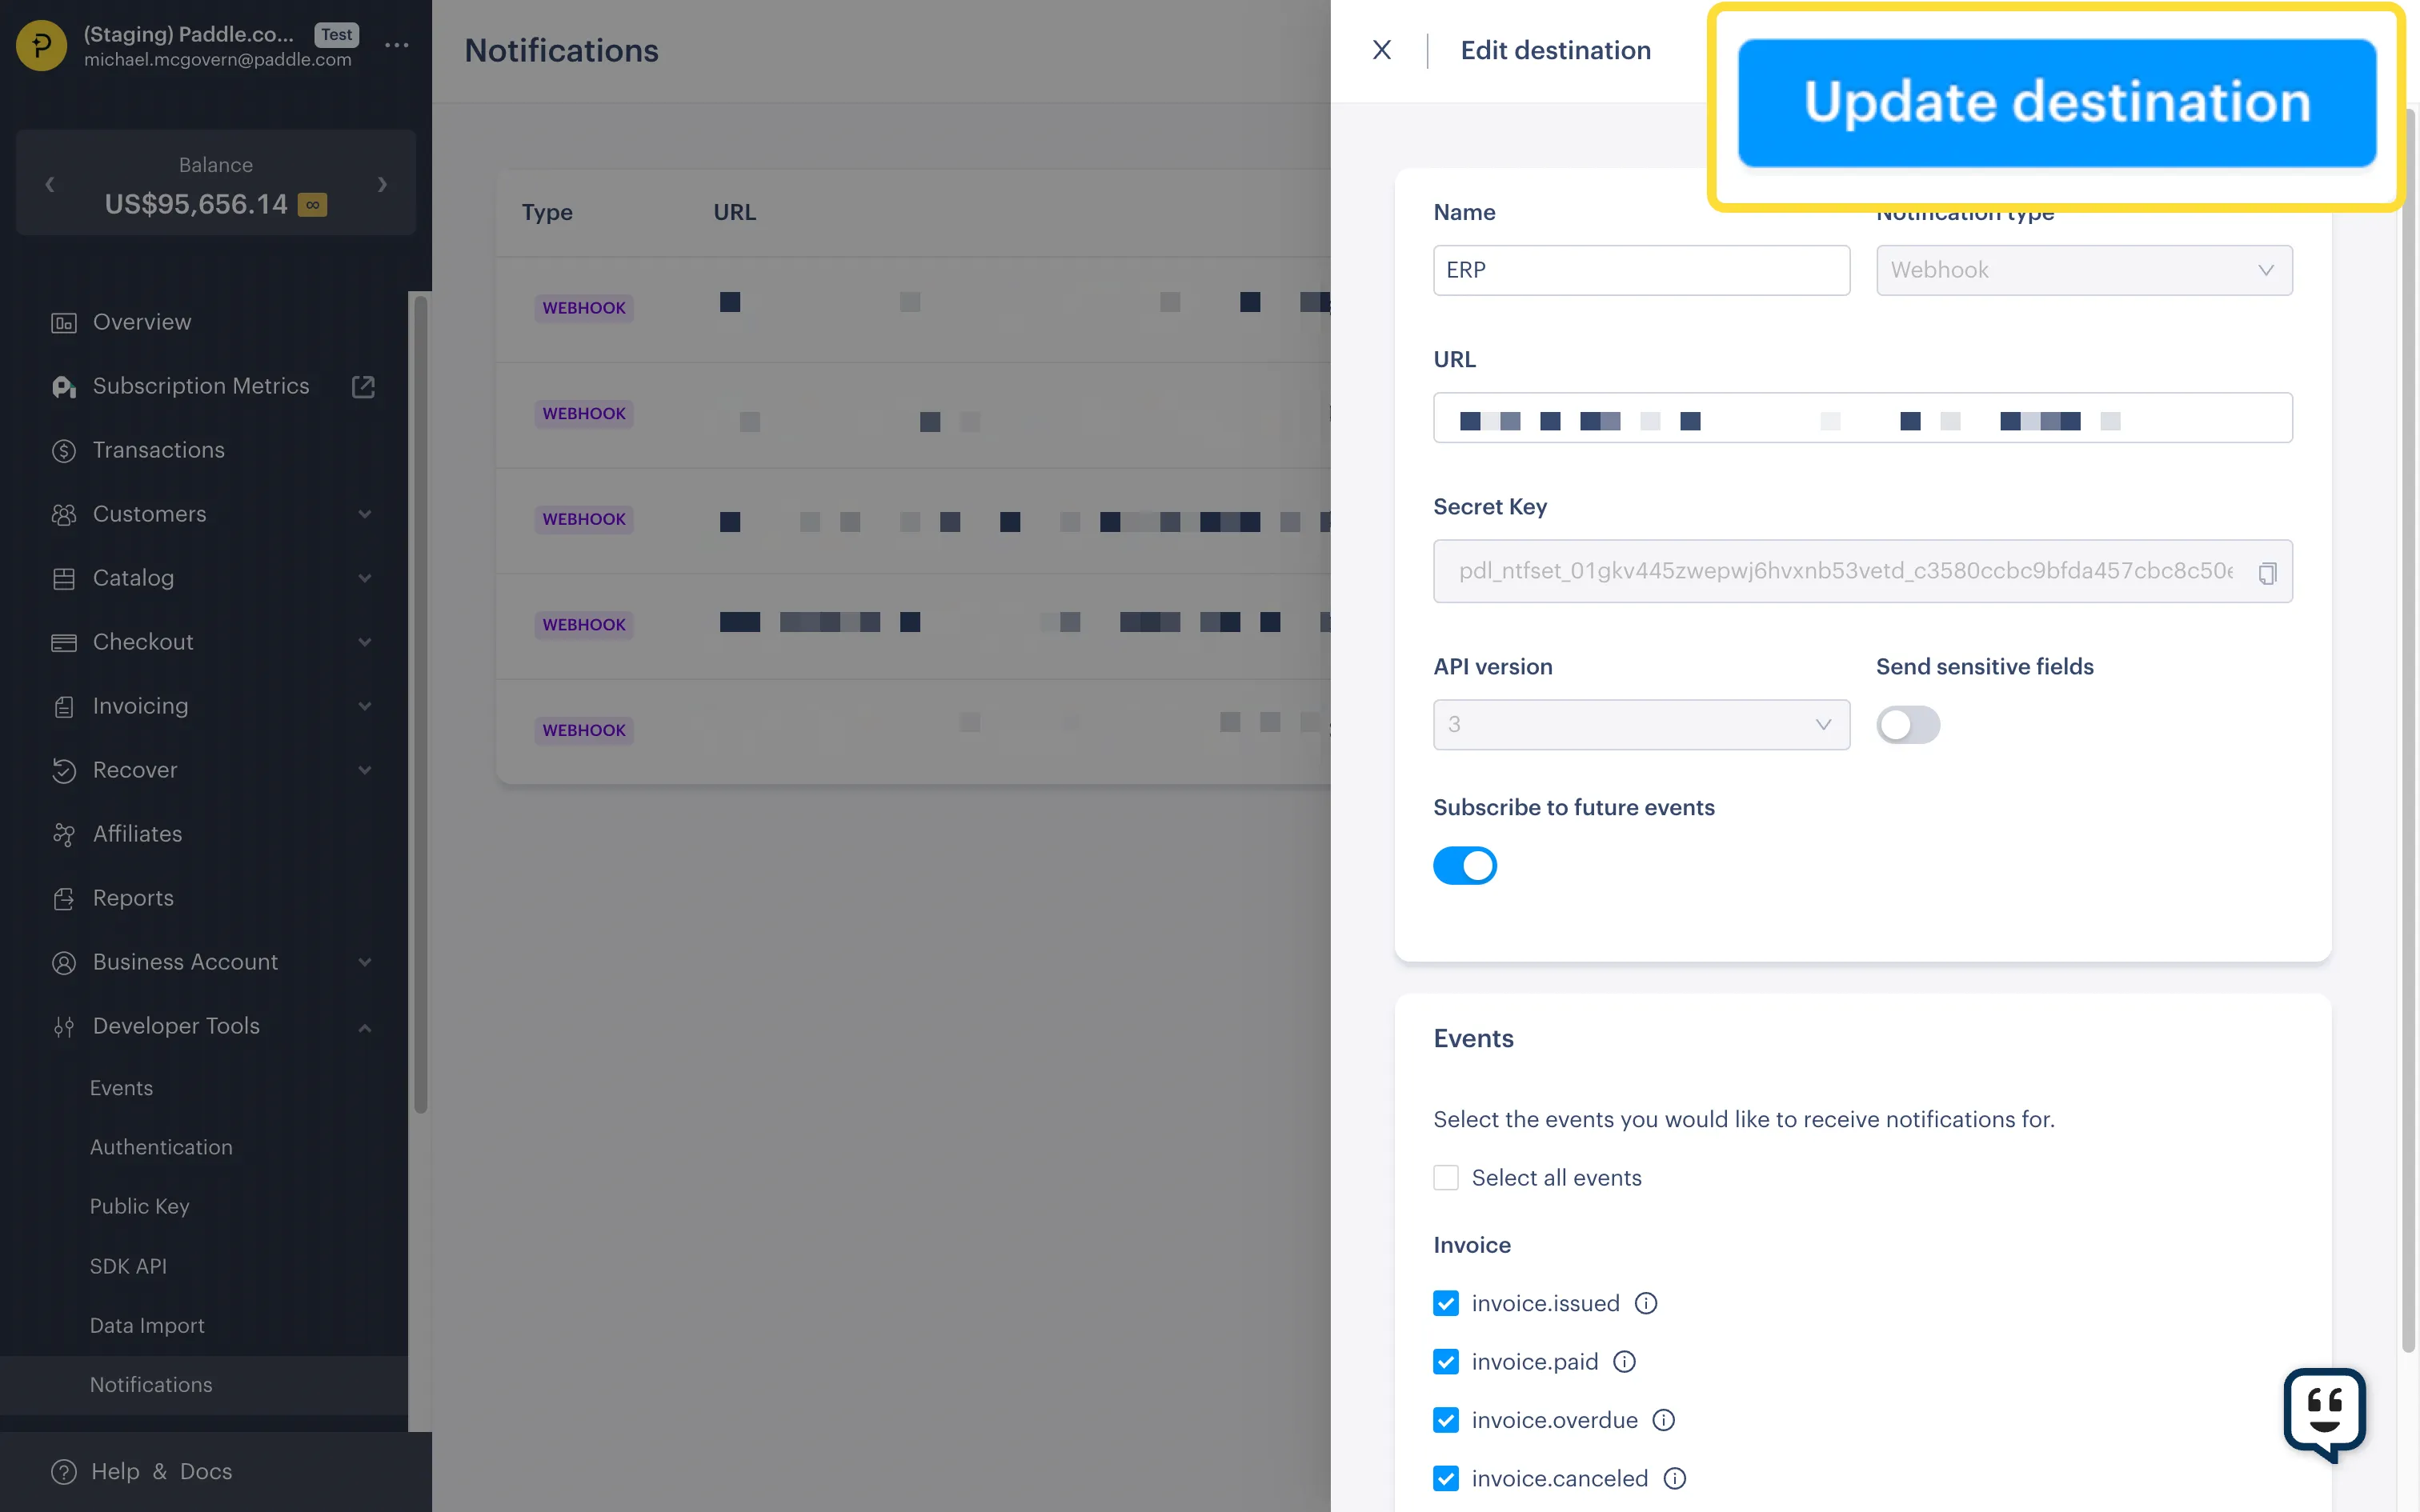
Review and save
Section titled “Review and save”Click Update destination when you’re done.
Deactivate a notification destination
Section titled “Deactivate a notification destination”Deactivate a notification destination to stop Paddle from sending events to it. Deactivation is useful if you need to make changes to a webhook endpoint server or integration. You can reactivate later, if needed.
Open notifications
Section titled “Open notifications”Go to Dashboard > Developer Tools > Notifications.
Click the three dots next to a notification destination and choose Deactivate.
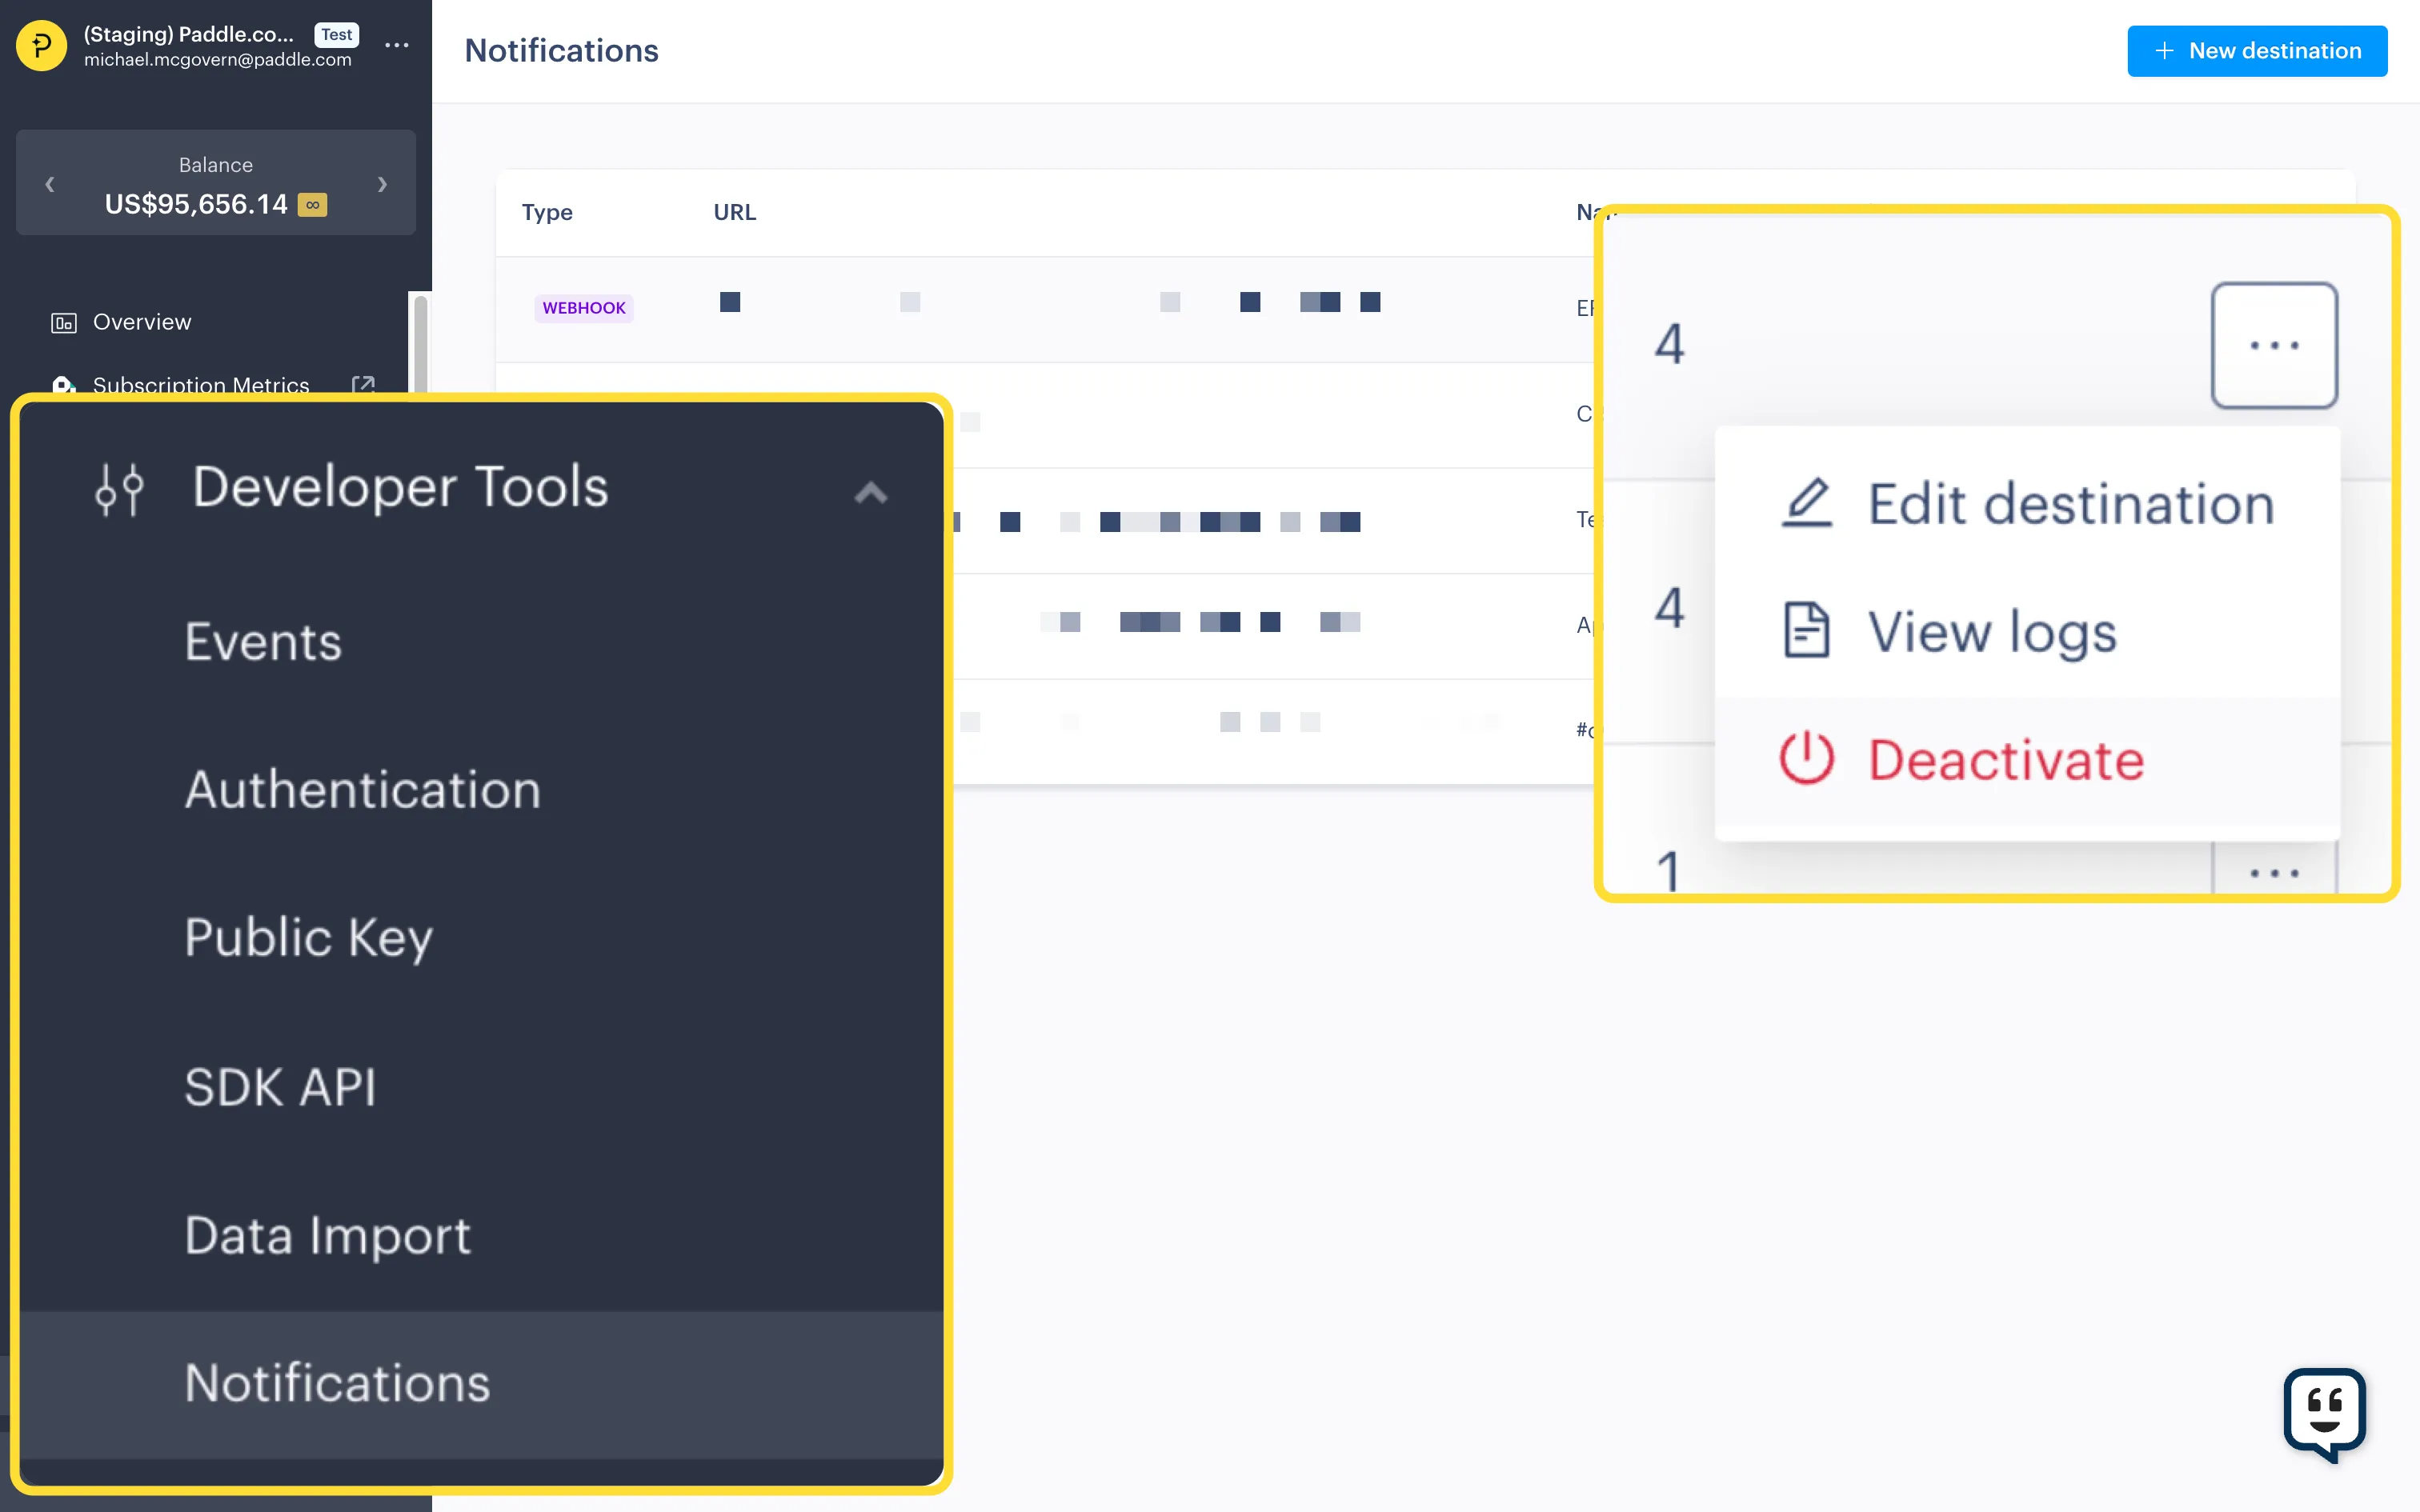
You can reactivate later by choosing Activate from the menu for an inactive notification.